
Sometimes practical examples can be helpful to make up one’s mind. The following project descriptions and recommendations for digitising slides address the following issues: what was there to be digitised (characteristics of the items)? how was it done (method)? why was it done as described (reason for basic decisions)? What is to be learned from the project (practical recommendations)?
The following statements are by Richard Crangle, founder and administrator of LUCERNA, a database devoted entirely to magic and optical lanterns, containing information and images of slides of all kind, lanterns and accessories, manufacturers, lecturers, location where events related to lantern presentations took place, any a lot more. The database is open to everybody. Those who are interested in contributing with details on their collection are welcome. They should read the following information carefully as they concern also the format of the files that can be uploaded in LUCERNA.
“A Million Pictures – suggested workflow for creating images of slides”
- Creating the image
1.1 Location
- Set up your copy stand or tripod on a table/desk top that’s high enough for you not to be bending over too much to place the slides (in the interests of your spinal health!), but…
- … also low enough to be able to easily see into the camera viewfinder.
- Try to avoid being next to a window – although natural daylight would be the best source of ‘front lighting’ for the slides, you’re at the mercy of the weather, and direct/bright sunlight is very unhelpful.
- If you’re in a room that has ceiling lights or other internal lights, don’t set up directly under them, and/or turn them off if possible, to avoid reflections or discoloration of your photos (e.g. fluorescent lamps may give a green cast when photographed, tungsten lamps will look yellow-brown).
- It may also help to have a black paper/card sheet to place above the camera to cut out reflections from the ceiling, but that can be cumbersome to manage and isn’t always necessary.
- Make sure that the camera is firmly secured to the stand and is level.
- Other useful things to have in your camera kit: magnifying glass, ruler (inches and cm), sellotape, blu-tack, scissors and/or craft knife, black cardboard, notebook or paper.
- Camera settings
Basically ‘auto everything’:
- Auto focus.
- Aperture priority (Av) exposure setting.
- Set aperture to (e.g.) f11 or thereabouts.
- Use a cable release (plugs into side of camera behind pull-out rubbery cover) – this cuts out the risk of camera shake and also prevents reflections of your fingers, but be careful that the cable doesn’t intrude into your photos.
- If you have a zoom lens, set it to about 50-60mm (lower numbers may give some ‘barrel’ distortion of the image, higher numbers will mean the camera has to be too high on the copy stand), then adjust the height of copy stand so that the slide almost fills the camera viewfinder.
- Light pad (back lighting)
- Make sure the light pad is switched on! (they sometimes ‘time out’ if left on for a while).
- Make a mask of black paper/card, with a central cut-out about 95mm square (for standard glass slides) and attach it to the light pad with sellotape at one edge – this helps to reduce reflections and miscalculations in the auto exposure.
- You’ll need to clean the light pad from time to time – dust and dirt from the slides builds up – and also watch out for bits of dirt, paper etc. contaminating the image.
- Oblique lamps (front lighting)
Probably the hardest part of the process to get right. Set up the lamps for a ‘first fix’ and check through the viewfinder for reflections etc.
- Place the lamps one on each side of the copy stand so that their beams shine just to the sides of where the slide will be – if they fall directly onto the slide you’ll probably get reflections or problems with the auto-exposure.
- If the lamps are set too high, or at too steep an angle, there’s more risk of reflection directly into the lens, but…
- If the lamps are set too low, or at too shallow an angle, you’ll get shadows of the mount round the edge of the slide image (or sometimes shadows of parts of the image itself, which looks rubbish).
- Once you have a set-up that works well, keep a mental note (or take a phone photo) of the arrangement so that it’s easier to set up again.
- Do some test exposures!
Before you commit to taking lots of photos, take a few and then invest a couple of minutes to:
- Check for focus (both slide image and labels/mount);
- Check for over/underexposure;
- Look for any rogue reflections of lamps, fingers, camera body/lens, ceiling lights etc.
Correct any problems and try again!
- Take the photos
- If the slide box has a number or name, either take a photo of it, or take a photo of a note on a scrap of paper/notebook page – this will help with identifying groups of slides later. If the box has no number, allocate one – usually just a sequence (Box 001, Box 002…) will do.
- Take the slides in the same order that they are found in the box.
- Make sure you have the slides the ‘right way round’ – for a rule of thumb, the side with labels (or ‘spots’ etc.) will generally be the ‘front’ and that’s what we want – but also check if there’s any writing in the image, or if you can see which side of the image has the photo emulsion (generally the ‘back’ appears slightly shiny when held at an angle to the light). If in doubt, take images of both sides.
- Check the viewfinder before taking each photo to be sure that the slide is (a) fully visible and (b) approximately straight relative to the viewfinder (it’s impossible to get this 100% accurate, but the better you can get it, the less processing time is needed later).
- If you need to take more than one image of a slide (labels on both sides, correcting a dud photo etc.), make a note for yourself so that you can make sense of the images later.
- At the end of a box, take one or more photos of the edges of the slides in their box, especially if they have edge labels etc. (this may need adjustment of the lens zoom, but the photo quality isn’t critical so long as anything relevant is legible). This will help with identification later.
- Keep going until (a) you’ve finished, (b) you get tired/bored, (c) you start making mistakes or (d) the building closes!
- Loading and identifying the images
2.1 Upload to PC
- Copy the image files from the camera’s memory card to a suitable folder location on the computer you’ll be using to process the images. Name the folder something logical, like ‘Incoming’. Depending on how many images you’ve created this may take a while.
- The camera will name the files cr2, where 1234 is a four-digit serial number. We’ll keep those names for the next few steps, but the files will later (step 3.6) get renamed with their Lucerna ID numbers.
2.2 Convert .cr2 files to .tif
Use the Digital Photo Professional software supplied with the camera.
- Open the program and browse to find the ‘Incoming’ folder containing your .cr2 files.
- Select all the .cr2 files (click first file of group, Shift-click last file of group to select all).
- Click the Batch process button on the toolbar.
- In the Batch settings dialog box that appears, set the following:
- Save folder – make sure it’s the same as the folder where the .cr2 files are currently (it’s easy to ‘lose’ files at this stage by accidentally saving them to some other folder!).
- › File format – set this to Exif-TIFF 8bit
- › Output setting – set the ‘Output resolution’ to 600
- › Resize setting – tick the checkbox and set the numbers to Width 3750, Height 2500, Unit pixel (this reduces the overall file size to something a little more manageable).
- › File name – make sure ‘Current file name’ is selected.
- Double-check everything and click the ‘Execute’ button at the bottom. Then go for dinner – the process takes some time to complete if there are lots of files.
- The dialog box will ‘remember’ most of these settings from one session to another, but not all – make sure you check everything again next time you process a batch of files.
2.3 Organise the images in folders
- Create one folder for each box (or other physical group) of slides and give the folder a sensible name to allow identification (e.g. ‘Box 34’, ‘Large grey box’ etc.). This will help with identifying the slides and also allow the owning institution to match up the digital images with the physical locations of the slides.
- In your ‘Incoming’ folder you should now have pairs of .cr2 and .tif files with matching names, including pictures of your notes of box numbers etc. so that you can easily identify the start and end of each group. Copy all the .tif files for each group into their relevant ‘box’ folder – make sure you get this precisely accurate to avoid confusion later.
- The .cr2 files can stay in the ‘Incoming’ folder for the time being, but just-in-case-of-accidents it would be sensible to make a backup copy of the ‘Incoming’ folder at this stage, before deleting files from the camera’s memory card!
- Within each ‘box’ folder, create four sub-folders to contain the other states of the files as you create them (in section 3 later). Name the sub-folders:
- › TIFFs – this will contain the master .tif files (2000px square) when you create them.
- › RAW TIFFs – this will contain the .tif files you’ve just converted from .cr2, after you’ve processed their master files.
- › JPG 500 – this will contain the Lucerna JPG files (500px square) that you will create from the master .tif files.
- › JPG 80 – this will contain the Lucerna thumbnail JPG files (80px square) that you will create from the master .tif files.
- It would be useful to create a list (spreadsheet) of all the folders you’ve created (i.e. all the boxes you’ve photographed), along with the numbers of each type of file processed into the various different formats, to allow you to log how far you’ve got with the project. Richard can supply a sample Excel ‘Logging’ file for you to adapt.
2.4 Identifying slides – general points
- It’s up to you to develop a way of working that makes most sense to you, but there’s a certain plodding logic to:
- Work through one ‘box’ at a time.
- Identify and rename the slides one by one in the same order that you photographed them (this will allow you to match the slide images with any labels, numbers or captions on their edges, if you also took photos of the full box of slide edges).
- Leave more detailed research and cataloguing (which can take any amount of time you choose!) till later.
- As you rename the files, the computer will probably sort them into order of their Lucerna numbers, which isn’t the same as the order you took the photos. This is one reason for having already backed up the files from the ‘Incoming’ folder, so that you can still refer to the original image order if you need to check or correct something.
2.5 Search Lucerna for each slide
- First check whether the slide already has a Lucerna record, to avoid accidentally duplicating something that’s already there.
- Most known British-made standard-size commercial slide sets are already recorded in Lucerna (though so far only about half have their slides listed); most privately made or non-commercial sets probably aren’t recorded.
- Searching for individual slides isn’t covered in detail here, but some general tips might be:
- › For commercial slides, they may have a set title, slide number, maker’s name or trademark, title label on the edge or mount, or other clues that suggest what they are.
- › Those details may help you to search for an individual slide (e.g. take a word from its title, perhaps combined with a slide number), or at least identify the set that it belongs to.
- › If you don’t find the slide at your first attempt, don’t assume that it doesn’t already have a record – try two or three alternative searches to be sure.
- This step may be slow, though it gets easier with practice and familiarity with styles of slide and the structure of the Lucerna data. It’s worth investing time at this stage to be sure – if a slide already exists in Lucerna you won’t have to enter much new data, and it’s very time-consuming to sort out duplicate records later.
The point 2.6 on how to create a record in Lucerna it left out as it concerns information too specific for a general audience, also 2.7 on the core information that have be registers about the slides and the collection it is part of, and 2.8 on the renaming procedure before uploading the file. The rest of the paper is on processing the images to make them fit Lucerna’s requirements. If interested please ask Sarah Dellmann or Richard Crangle to mail you the instruction sheet.
The following remarks could be helpful when the photographer cannot use her/his or the archive’s facilities. Working outside one’s own four (studio, office) walls means having less equipment and working in an unfamiliar and often unforeseeable context. Improvisation skills and photographic experience are essential to get decent results when, for instance, visiting a collector at home or photographing in the vault of another institution.
If a camera-stand is too heavy and voluminous to travel with, it can be improvised with the help of a three-stage tripod with an extension allowing the camera to be situated in parallel to the slide. Some tripods allow you to detach the upper part and fix it upside down between the three legs, so that the still-camera hangs between the legs. In this position, the photographer is less restricted by the length of the tripod’s feet, s/he can regulate with more subtlety the proximity to the slide and photograph it without using a zoom. The light in the room should be switched off or well dimmed, as the ceiling lamps can produce unwanted reflections on the brilliant surfaces of the objects. If this is not possible, a long black cardboard carried in a tubular for posters (or three black ones to be attached in 90 degrees to each other) can be put like a circle around the tripod to avoid light reflections from the side. A black cloth would do as well, but as it needs to be fixed somewhere it is more complicated to integrate it into the photographing operation. However it can be used to cover the window of the collector’s room if no blinds exist or the curtains do not completely block the sunshine. In the windowless vaults of an archive the cloth can be used a “dimmer” to reduce the influence of the ceiling’s light sources.
Two flexible desk-lamps borrowed from the archivist, or night-table lamps borrowed from the collector, could be equipped with bulbs for daylight lamps which should have been used evenly to avoid disparity in colour temperature. To make sure that both bulbs are equal, a test can be done. If no light meter is available, photographer John Hedgecoe (2004, p. 350) suggests putting a pen perpendicularly in the middle between them at equal distance and to check whether its shadows are equal in blackness. Another photographer, Alan Horder (1958, p. 41), suggests folding a white sheet of paper in the middle, putting it like a triangle with the top above at equal distance between the lamps so that each lamp only fully illuminates its own side. If the eye can see a difference, the difference in colour temperature will be noticeable in the picture.
If a light box cannot be brought, it can possibly be replaced by a window to the north side of the collector’s house. The slide leaning against the window glass can be framed with a big black cardboard scotched to the window. The cut-out where the slide is placed should leave a minimal white space around to show the edges of the item. Another solution is to place the standing slide at a certain distance in front of a white cardboard and illuminate the white surface from both sides, i. e. left and right; the clear background will reflect the light and send it through the transparent parts of the slide.
To photograph under these circumstances means that expectations should not be too high, as the quality of the reproduction can be rather limited. Corrections in post production may be necessary. Also, time is mostly restricted, and the photographer has to work rapidly. The archive may have a general digitising strategy, but in such a particular case it may be good to consider in how far a divergence is acceptable. It may be practical to select what to reproduce from each slide, e.g. both or just one side, for wooden framed ones just the content or also the frame.
If no tripod is available, the camera needs to have an anti-shake function, especially when doing close-ups. Also a grid visible in the viewfinder is helpful as it indicates whether the camera is positioned correctly above the slide: its edges should be in parallel to the lines of the grid. After each shot, before moving on to taking the next slide, the reproduction should be checked to make sure it is sharp and the colours are correct. The evaluation should be done by zooming in on an area of the image which contains edges to see whether they are sharply depicted. The check also ascertains that the whole slide including a little margin is taken and nothing was accidentally cropped. This will take several seconds and empty the accumulators quicker, but to notice flaws at the end of the session or back at the archive makes things much more complicated.
After each session, the production should immediately be transferred from the memory card to the computer to save it. Also the files need to be named to become retrievable: the RAW converter proposes conversion per batch, which allows to title a series according to a strictly applied classification system including an index-word (e.g. name of the collector). Before the reproduction can enter the data asset management system, it is important to give the RAW file and the proxy the same name; if possible, slides belonging to one series (e.g. a special collection, a particular content) should be kept together as this will help the photographer to find a specific glass plate quickly. When the cataloguing department takes over the data, the name of each file has to be refined to make the growing data pool better researchable. Once the files are saved on the computer the “impressions” on the memory card should be deleted to give the next session a “fresh” start. Too many pictures on the same repository make the convolute protracted and tedious to work with.
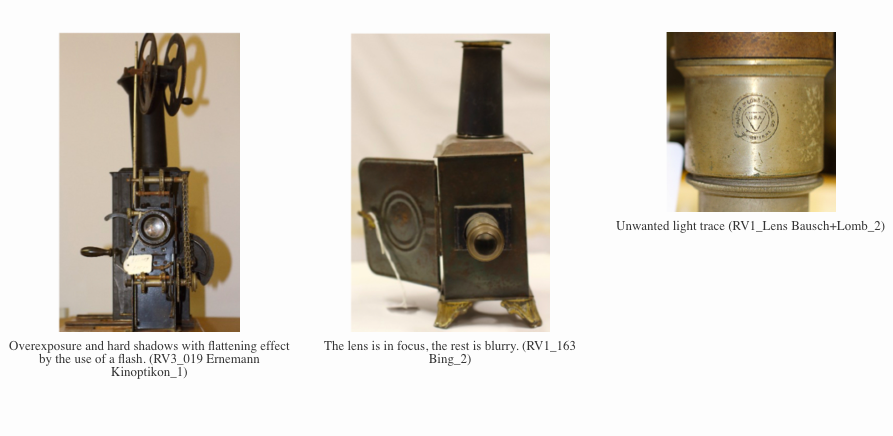
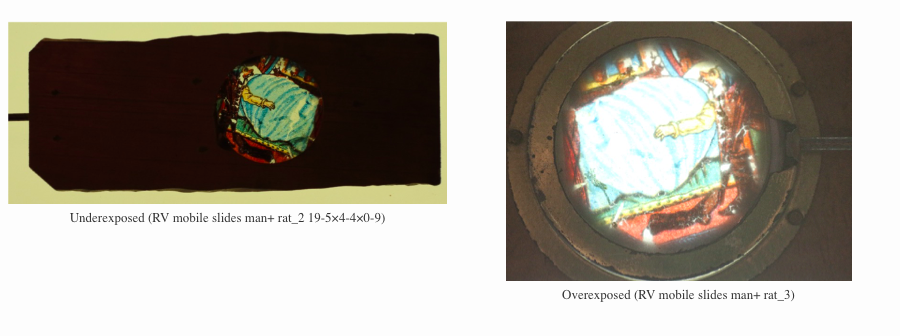
There can be several kinds of flaws when working with limited equipment. Working with a flash can produce overexposure (eliminating information) and hard shadows which may flatten the appearance of an apparatus. The autofocus function has just one part of the object “in vision” and blurs the rest. The room light cannot be blocked and leaves annoying traces. The automatic white balance function does not always work reliably and can make the same slide look differently (see chromathrope slides) or underexpose and overexpose a shot (see mobile slides Man with rat).

This “list of don’ts” is based on a long experience in digitising slides and diapositives.
- Scanning slides
- Don’t try to use your flatbed scanner to make two images of the same object (i.e. slide frame with the information on it and glass plate image) in order to put them together back later in post processing. It works, but will take a giant amount of your time. Plus, it often still does not look like the real thing.
- Photographing slides
- Mount your camera (tripod or repro stand), so every slide is photographed from the same angle and height (it will save time in post processing).
- Don’t use a camera without flash as the images will get blurry and yellowish. The workings space is seldom bright enough to work without a flash.
- Don’t use a camera with in-built flash that can’t be switched off, as it comes down directly onto your slide and its glass plate and thus will create a big reflection (you won’t see anything from the image content anymore). That said, you’ll need a camera with the possibility to add an external flash (no bridge camera, no pocket camera).
- Lights: The light sources have to be to the left and to the right of your slide (use a repro stand or make sure your lights hold their position).
- Don’t think one lamp on one side is sufficient (it will create shadows and a darker half)
- Don’t use normal desktop lamps standing around in your office for lighting (the images will get brown-yellowish). You’ll need calibrated white light.
- Don’t use normal light bulbs in your light table for the same reason. But the most tables are calibrated anyway.
- Don’t forget to clean your light table, slides and camera lens before you start. In most cases, clear water and a cloth for wiping is enough for the slides. Cleaning fluids tend to create ‘stripes’ and are sometimes harmful to the slide’s paper frame
- Make sure you have everything switched on (don’t forget the flash lights or the light table, as stupid as it may sound).
- Don’t “wobble”. Your camera may be fixed, but the whole table might be set in motion as you lean against it positioning your slide. Set the time clock of your camera to a little delay. So you have time to get your hands and body off and everything stands still, before the image is taken.
- Every camera is different. I’m using aperture 8,0 and exposure time 1/100. You should make a few tests to determine your best camera mode, especially have an eye on the white balance in your camera’s menu!
While photographing the collection of the Cinema Museum in Girona Daniel Pitarch made the following experience and shares recommends to keep in mind:
- the importance of taking a photo of the whole slide including the frame. The frame can have important information for documentation and research (for instance the color of the paper frame can define the manufacturer). If only one photo can be taken it should be a photo of the whole slide rather than only of the image on it.
- the importance of having two light sources (one above and one below) and also, if possible, of taking two photographs (one with light above and below and one only with back-light) as the colors of the slide will be reproduced better with only back-light
- dealing with two light sources is a bit tricky for a proper photographic exposure, as you are taking a photo of two very different surfaces (the opaque frame and the transparent glass); compromises have to be made.
- the importance of the mechanism of the slides; if only one photo can be taken it is better to show the side of the slide where the mechanism is.
- slides made of two glas plates can produce very different results depending on which plate is facing the camera and which one is below. The plate facing the camera will be more in focus, and the other one can be a little blurred due to the plate on top. This is important if you are taking a photo of only the image in the slide (images that are useful for re-use purposes). If your slides have a figure and a background it is better to put the figure facing the camera.
- for video documentation of moving slides, it can be helpful to remember that slides were used in the lanterns upside down. In many occasions, it is better to record the slides like that, as the movements of the glasses are more fluid and the masking of part of the images work better. After the recording, it is easy in video postproduction to flip the image to its proper position.
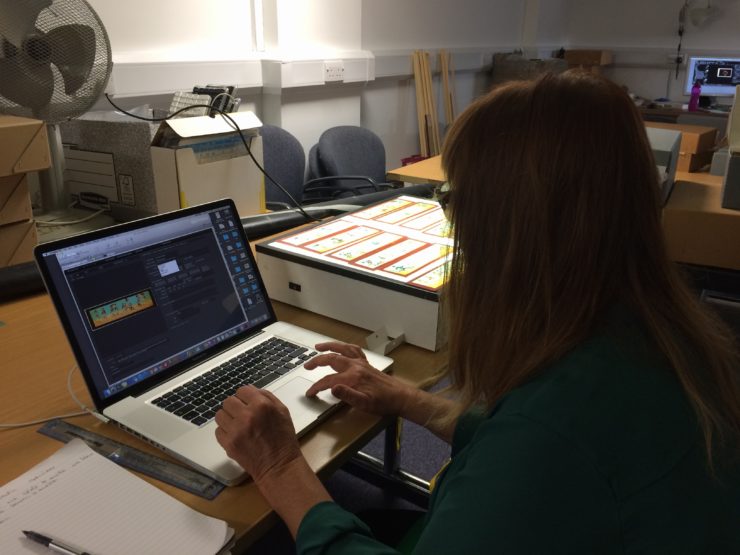
The following “Lantern Slide Digitisation project” project was organised during summer 2016.
Screen Archive South East (http://screenarchive.brighton.ac.uk) is a regional not-for-profit archive based at the University of Brighton in England. Besides holding some 9.000 glass lantern slides in its collection, SASE cares for a variety of other screen related assets such as films, videos and born digital items.
The lantern slides are stored in a shared strong room with the Design Archives’ paper collections in a controlled and cool and quite dry stable environment (British Standard 5454; temperature: 17° Celsius; relative humidity: 40%).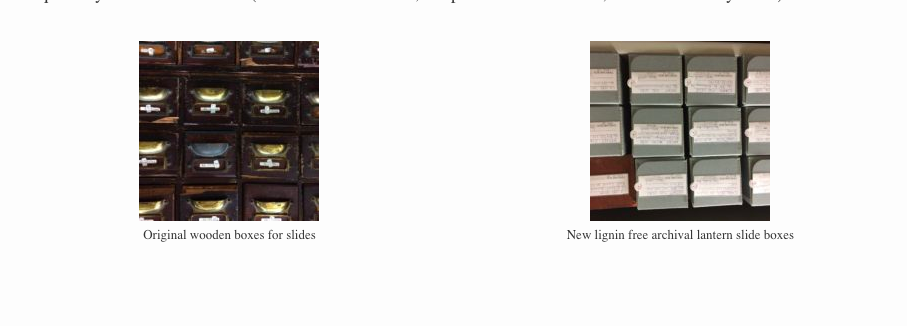 When original wooden boxes, slide containers and cabinets are in good condition SASE may decide to store the individual slides as they were acquired. At other times slides are re-packaged into new lignin free archival lantern slide boxes. We always ensure to record the way the slides came to the archive, in what container and in which order they appeared before making any changes. Now we try to make photographs when we can. SASE appreciates the necessity for storage to be a clean, dry and secure environment, especially for those hand-painted, lithographic and photographic slides which do not have a cover glass to protect the image. However, because of time limitations SASE at present only superficially gives conservation treatment to slides, such as air blow brushing to remove access dirt and the use of Selvyt cloth to gently clean standard double glass slides. The repair of bindings, the careful replacement of cover glasses and the restoration of mechanical functions have not been attempted yet. SASE does not adhere to restoration work that includes retouching or reapplying paints in damaged or degraded areas. Such work can be established through manipulations of the digital file when appropriate for say exhibition, publishing or performance purposes.
In the Summer of 2016 SASE set aside four weeks to digitize a selection of panoramic and mechanical and dissolving moving slides. They were in part hand painted and in part using a lithographic or transfer process. They came in various sizes, from tiny toy slides to very long ‘procession’ slides and date from the 1830s to the 1920s.
We had limited time to use a basement classroom location for establishing a temporary fixed photographic digitization set-up. We were fortunate to not only be able to borrow a high-end digital camera and other necessary attributes but also to have technical support from the photography and information services departments here at the university.
I spend at least a week preparing which slides to digitize and to make sure that they all could be tagged and identified and that their storage locations were clear. A large part was re-packaged into new archival boxes. Because most of the slides came to SASE without a clear numbering or a definite commercial set order I at times created allocated subject sets based on the assessment of size, technique, labelling and / or subject matter to identify allocated archival groupings.
Working with the SASE’s slide database.
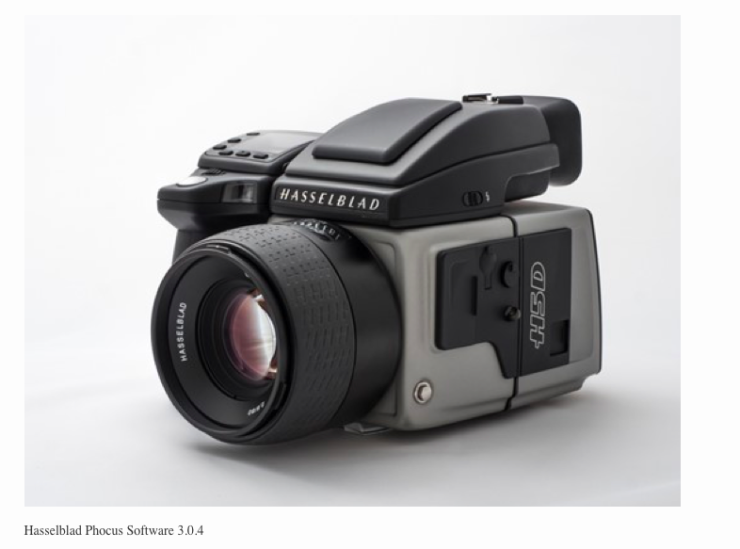
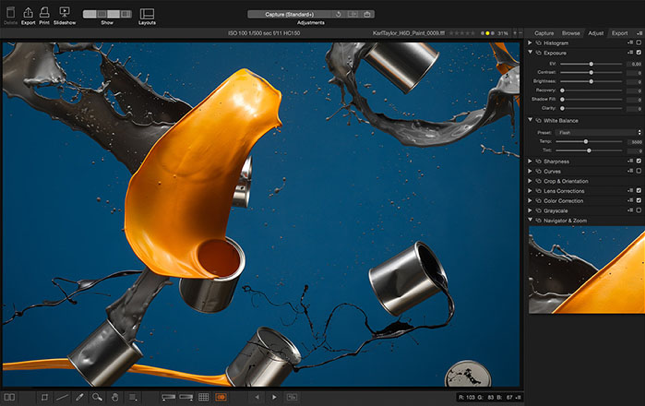
The digitization of the slides was done consecutively recording identification details as well as photographic settings for exposure, aperture and colouring in a specific software package called PHOCUS which is designed to work with the Hasselblad camera (link: https://www.hasselblad.com/phocus/). A lot of this information was harvested automatically. The camera automatically created RAW files in Hasselblad’s unique digital format 3FR.
We decided to leave the creation of mezzanine master files and jpeg access files to a later date. As quite a number of our corpus was photographed multiple times to later amalgamate into a best result, there was no time to do this within the project time. The uploading of ‘clean’ slides and cataloguing information for online public access is still an ongoing process of activity.
SASE has an internal database for magic lantern materials that is at present limited to collection and set level entries with in part basic item descriptions within set level. SASE adheres to map to controlled vocabulary fields in the LUCERNA lantern heritage web resource (link: https://www.slides.uni-trier.de).
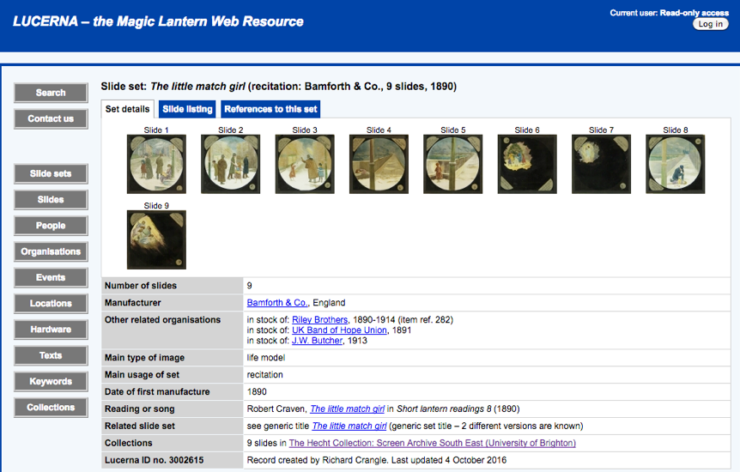
Search result for the slide series “The little match girl” (1890) on the database “LUCERNA lantern heritage web resource”.
SASE’s slide database was revised and adapted to link to the specific software package Phocus, used in the digitisation project. Besides the inclusion of the Phocus created camera data and the very important archive collection identifier, tagging and labelling information we had only limited time for database accessioning. Fortunately, I was able to work with a volunteer for the period who was a great help in cataloguing additional technical and content data related to the digitised slides into the revised database.
To make the most of the short time we had available for this project we mainly used a two-dimensional set-up, photographing objects from below and above. Sometimes we needed to photograph the slides in parts to accommodate the longer panoramic sizes. The moving slides were photographed multiple times to allow for a re-creation of motion. We experimented with various exposures and shutter speeds but tried to fix them as much as possible.
It was decided to catalogue the measurements of the slide separately as we could not find a good way to set-up measurements within the capturing of the raw file. This does mean viewing the original slides again to write down the measurements.
Raw slide pictures for a panoramic slide:
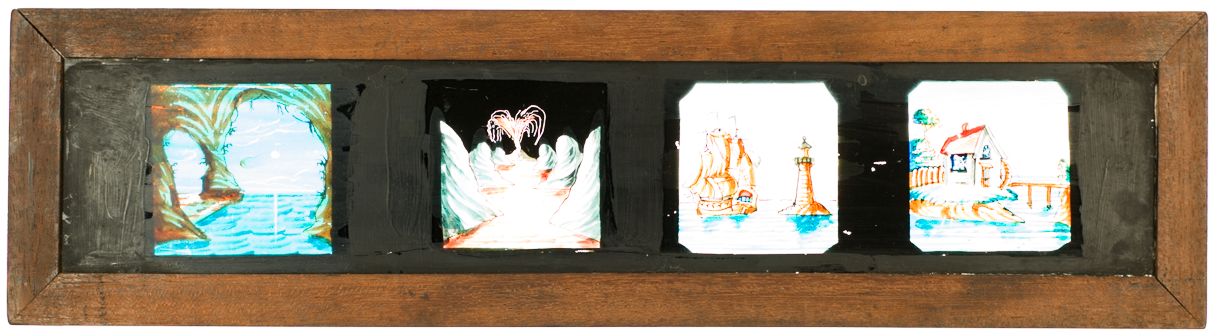
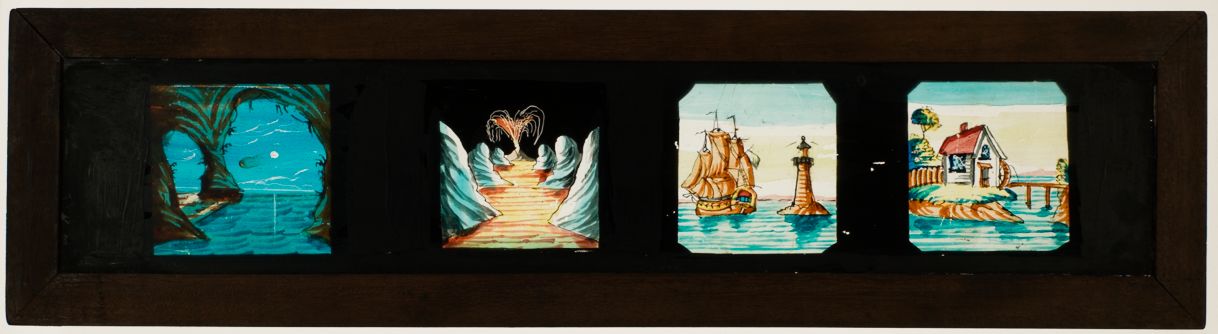
Processed and unprocessed slide in postproduction.
Lantern slides are a specific screen media artefact made up of an image, a mounting and often some form of labelling. All of these were considered of equal importance. SASE tried to digitize as truthfully as possible the colouring and density of the image. But we also wanted to record the surrounding wooden frames, the various glass bindings and all numbers and text embossed or written on any side of the slide. This needed multiple exposures for each slide.
What we found extremely important was the clear and uniform naming of the image files and the set groups as well as a good short description to help with easy identification. Besides, recording the digital files into a consistent folder structure for postproduction work and sustainable storage.
When photographing the wooden mounted slides, it was better to have the shallow end of the image up so to not cast a shadow of the ring or square of the wood.
In this project, we were able to digitise some 400 slides which may not sound much but we learned a lot. We experimented with the set-up, we established a routine and developed a naming convention. All of this will be a great help when we have time to do another such project.
EQUIPMENT
- Camera
Hasselblad HC 80mm f/2.8 Lens
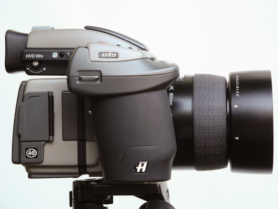
Hasselblad H4D-40 Camera
Hasselblad H5D Multi-shot Camera
- Supplementary elements
Kaiser RS 1 Copy Stand with RB5000L Lighting Unit
Kaiser Pro-light Basic Lightbox
Various bits and pieces such as a spirit level, a blow duster, black cardboard, tape measurer, etc.
- Hardware
Apple MacBook Pro with 500GB Solid State Drive, 16GB RAM
Apple Cinema Display 20 inch
Spyder4Pro monitor calibrator
- Software
Hasselblad Phocus Software
Filemaker Pro database software
SET-UP and WORKFLOW
Ad 1. CAMERA
Initially we worked with the Hasselblad H4D Camera and got good results. However, we did not have the camera setting control via the latest Hasselblad Phocus software package. With the H4D we therefore had to use the on-board camera control buttons and this proved difficult. As the camera was mounted high on the copy stand we needed steps to see the settings. Even when carefully changing the settings using the buttons on the camera we often put it out of focus as it moved slightly, this despite the secure mounting on the copy stand. We were also hampered by a very shallow depth of field when working at 70cm from the Lantern plates (this was to accommodate the panoramic format). Within this shallow depth of field the focusing was tricky as we were unable to rely on the camera’s automatic focusing function. Even when using the camera’s inbuilt viewfinder and calibrating the dioptre setting we still were unable to accurately focus the camera.
After consideration, we switched to using the camera model H5D Multi-shot and coupled with the latest Phocus Software (3.0.4) this allowed us complete control of the camera from the computer, which improved our control considerably. We also found that the dioptre adjustment on the viewfinder was more accurate than the H4D-40, and easier to adjust then relying on the operator’s eyesight.
With this combination of camera and software we were able to lock-up the mirror and control the fine focusing of the lens. Locking the mirror created less vibration in the resulting shots and this made a big difference to the quality of the final image. The software also allowed fine control of the focusing and fractions of f-stop and speed, resulting in pleasing results that we were not capable of reaching in the H4D.
Both cameras were powered by battery packs and overnight we would charge the batteries so that they had a full charge when starting the next day’s work. The cameras were attached to the computer via a fire-wire 800 cable, this connection was recognized by both the Operating System and the Phocus software. A problem we experienced was that the camera’s inbuilt setting went to sleep after a period of non-use and in sleep mode the camera dropped the fire-wire connection. To get the software to recognize the camera again meant that we had to remove the camera battery and then reinsert it once more. Once we understood this it was a simple procedure to re-establish the connection.
Camera Lens
Hasselblad 80mm, which had an aperture range of f/2.8 – f/32, magnification 1:6:5.
Although we were offered the Hasselblad Macro lens (which has a very good reputation), we actually used the 80mm. We were informed that although the Macro was able to focus at a distance of 39cm (as opposed to the 70cm of the 80mm lens), that by focusing so closely with the Macro it would cause a distortion in the image. To avoid this type of distortion we would have had to move the macro lens further away from the lantern slides, which was impossible because of our set-up. We were bound by the height of the copy stand on the working desk, besides the restricted ceiling height in the room we were working. We established that having the slides positioned at around waist height was the most efficient way of working. Because the camera itself was positioned some two meters from the floor it was especially helpful to control the lens via the software rather than having to climb up a ladder to look through the viewfinder. As the camera was almost at the top of the copy stand with very little room for adjustment it would be better to have a copy stand with a longer column.
Ad 2. SUPPLEMENTARY ELEMENTS
Copy stand with lighting unit
Kaiser RS1 Copy Stand with RB5000L Lighting Unit.
This stand, although robust, was not very user friendly. The positioning of the lights at a 45-degree angle was not an exact science and the securing bolts for positioning these lights were clumsy. The lights’ daylight tubes were visibly different to each other and even with putting in replacement tubes, it was a case of finding tubes which light colour and density matched each other as closely as visible to the human eye. In hindsight, it would have been better to use a stabilized power supply, for the lights to avoid fluctuations in the mains power affecting the light temperature, and buy brand new daylight tubes.
Daylight light box
Kaiser Prolight light box with 2 x 5000, Colour temperature 5000-Kelvin tubes.
We tried various grades of daylight light boxes and found variations in the temperature of the light, despite that all the bulbs were marked as Daylight tubes. We realized that these light boxes were average, not great. Internet research and discussions with the Photography unit made it clear that an accurately daylight balanced light box for this type of reproduction would cost in the order of £ 1,300 pounds. Not having this budget available we choose the one with the most consistent, whitest and clearest light. Again, it would have been better to have used a stabilized power supply and new tubes.
Copy Stand and light box in use
To obtain an even light, and to avoid glare we had to experiment quite a lot in the beginning to get the correct angle of the lights. Although we used both lights for photographing the plates, when photographing the wooden frames that were punched or stamped with the manufacturer’s markings, it was best to redirect one of the lights, so that a shadow was created on the wood graining and the lettering which then became quite readable.
Grey scale setting
To ascertain the correct grey scale balance, we turned off all lights in the room (our location was without windows) and the slide was just illuminated by the copy lights and lightbox. We then photographed a X-Rite Digital ColorChecker, which contains an accurate graduated grey scale. However, we realised that this gave us incorrect results. What we needed was not colours printed on a card but a transparent film containing the colour and grey scales, as photographing flat artwork (which this card is intended for), is very different to the lantern slide medium in which light is passing through. This type of ColorChecker is expensive and cost around $499 as in the HutchColor HCT (http://www.hutchcolor.com/HCT_overview.htm). It is a possibility to investigate in the future when funds are available.
Light meter
We began by using a Sekonics Light meter, which helped us sort out the basic lighting setup. However, we found very quickly that by the correct positioning of the lights and using the Hasselblad controlled by Phocus, that the light meter became redundant.
Settings
We did a lot of experimentation with the shutter speed and aperture and had to adjust them for different types of slides but we tried as much as possible to keep to a fixed setting per type. Most wooden moving slides were using ISO 100, 1:60, aperture 8 for the image and ISO 800, 1:16, aperture 8 for the mounts. Light meter in centre spot. White balance = daylight. Focus = true focus.
A lot of the slides were photographed twice: once for the best result of image and once for the best result of mount. This was not done for the slides with bindings. This however meant that the colouring of the binding is not correct and often shows dark.
Use of Spirit level
The use of a small spirit level became indispensable whenever the camera was re-set up (every evening we had to secure the camera in a secure vault, due to its expense). So, every morning the camera was re-fitted to the copy stand and re-calibrated for the correct positioning and lighting. We found that the easiest method of ensuring that the camera was on the correct plane as the slide was to place the spirit level against the end of the lens hood, as this was the only flat area on the camera.
Black Card
We found that cutting two or three large pieces of black card proved invaluable for masking slides when placing them on the lightbox, as this blocked out extraneous light around the slide.
Dust Blower, soft brush and soft dust cloth
These all are a must for regular use on the lightbox, slides and camera lens to remove dust that accumulates in the process of storing and photographing the slides.
Ad 3. HARDWARE
Computer setup
The MacBook Pro was setup with an Apple Cinema Display attached so that we could work using two monitors. The cinema display was calibrated using the product Spyder4Pro to obtain an accurate colour in viewing the resulting scans. This proved important as our eyes adjust differently and slight shifts would easily occur. The software allows the monitor to be correctly calibrated for different uses and we chose an LCD display. As we were working in a darkened room the Spyder Pro software automatically compensates the calibration for the ambient light, the usual calibration setting in these circumstances is between 5000K and 5800K. We chose 5000K to match the camera’s inbuilt calibration and the temperature of the tubes in the copy stand and light box. An external 1TB drive was attached to the computer in which to store the images.
Ad 4. SOFTWARE
PHOCUS software package
This software gave us control over the camera via the computer. Phocus was downloaded for free from hasselblad.com
Filemaker Pro software package
SASE uses Filemaker Pro as its main database and cataloguing software. The lantern slide information combines fields fitting our in-house identification and description system, fields mapped to values and criteria used in the Lucerna online web resource and fields harvesting information from the Phocus data recording. The lantern slide database is automatically backed-up when exited through the use of a script.
Troi File Plug-in 8.6
The Lantern slide database has been built around the Troi File Plug-in and the plug-in needs to be installed for the DB to function, the licence costs $99 per user, and can be bought via the online store – (http://www.troi.com/software/fileplugin.html).
The Troi plug-in imports the metadata embedded in files created by the Hasselblad camera and the Phocus software into FileMaker. The metadata contains details on the camera, lens, settings on both, and also any information recorded into the core info of the metadata at the time of digitisation.
File Creation
The camera automatically creates RAW files giving them a generated Job number with fff at the end. Mezzanine master files (such as Tiffs and GIFs) create the ‘clean’ and ‘assembled’ picture files for archival use. Access files (such as Jpegs) can be created using the Photoshop software to crop, rotate and overlay when necessary and produce a small size and resolution image. This can also be imported into the slide database as a reference image. We made the decision to show a narrow border of white around the slide image to show all irregularities of the physical slide and make it specific that we are here dealing with a ‘slide picture’.
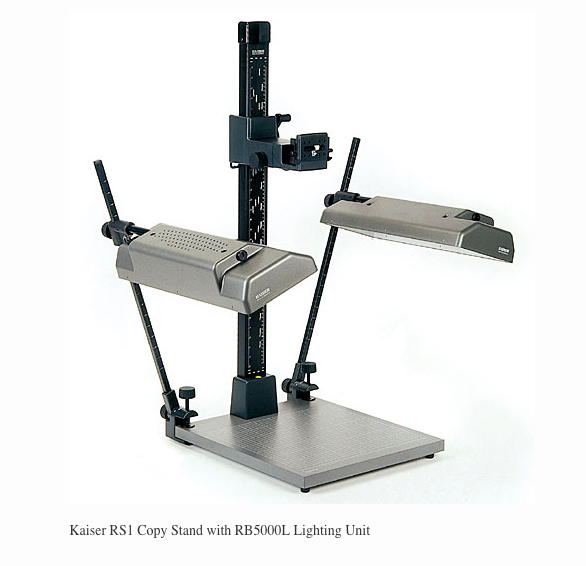
The RS1 professional quality copy stand for DSLR or video cameras up to three kg weight, with a 2 x 36w cold light 5400K fluorescent light set which gives double the light output of the RB218N unit. The stand has an extra-wide vibration-resistant column in black anodised aluminium, marked with cm and inch scales. Height adjustment is by hand-cranked friction drive with spring-loaded weight compensation, and a camera arm RA1 is included. The non-reflecting matt grey base has a fine printed positioning grid, and can be levelled using the feet referencing a spirit level mounted in the column base. A large range of accessories is available for the RS1 allowing it to be adapted and extended as required.
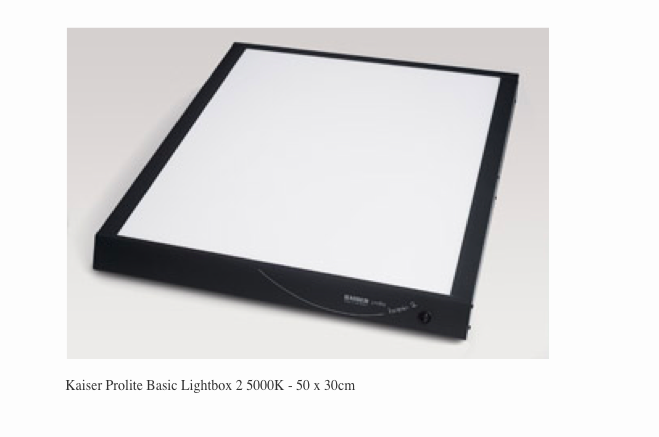
5000-Kelvin color temperature. Uses special fluorescent tubes for high color fidelity. Color rendition index CRI = 90-100. High-quality acrylic-glass plate of exceptionally uniform transmission over the entire visible spectral range. Robust, all-metal housing with non-slip rubber feet and the possibility to mount the light box on a wall. ON/OFF switch. 2 m (6 ft. 7 in.) power supply cable.
Apple MacBook Pro
With 500GB Solid State Drive, 16GB RAM (15inch, early 2011)
Processor Core i7
Processor Speed 2.2GHz
64 bit
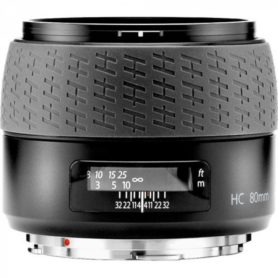
Hasselblad HC 80mm f/2.8
Focal length 82.3mm
Aperture range ƒ/2.8 – ƒ/32
Lenses/Groups 6/6
Focusing range 70cm – Infinity
Magnification at close range 1:6.5
Coverage at close range 36 x 27cm
Weight 475g
Product no. 3023080
Hasselblad H4D-40 specifications:
| Sensor size | 40.0 Mpixels (7304 x 5478 pixels) |
| Sensor dimensions | 32.9 x 43.8mm |
| Pixel size | 6.0 μm |
| Image size | RAW 3FR: 50 MB. RGB TIFF 8 bit: 120 MB |
| True Focus | Yes |
| Shooting mode | Single Shot |
| ISO speed range | ISO 100, 200, 400, 800 and 1600 |
| Shutter Speed | 256 sec. – 1/800 |
| Color depth | 16 bit |
| Color management | Hasselblad Natural Color Solution |
| CF storage capacity | 4 GB CF card holds 75 images on average |
| Capture rate | 1.1 sec. per capture. 50 captures per min. |
| Color display | 3 inch TFT type, 24 bit color, 230 400 pixels |
| Host connection type | FireWire 800 (IEEE1394b) |
Hasselblad H5D Multi-shot specifications:
| Sensor size | 50 Megapixels (6200 x 8272) |
| Sensor dimensions | 32.9 x 43.8mm |
| Image size | 6.0 μm |
| Image size | RAW 3FR capture 65MB on average. TIFF 8 bit: 154 (50c) / 600MB (200c) |
| RAW File Format | Lossless compressed Hasselblad 3FR |
| Shutter Speed Range | 34 minutes to 1/800 sec |
| ISO speed range | 100, 200, 400, 800, 1600, 3200 and 6400 |
| Colour Definition | 16 bit |
| Colour Management | Hasselblad Natural Colour Solution |
| Color management | Hasselblad Natural Color Solution |
| Focusing | Autofocus metering with passive central cross-type sensor. True Focus with Immediate Focus Confirm (IFC). Instant manual focus override. Metering range EV1 – 19 at ISO 100 |
| Viewfinder Options | HVD 90x: 90° eye-level viewfinder with diopter adjustment. Image magnification |
| CF Storage Capacity | 8GB CF card holds 120 images on average |
| Storage Options | CF card type U-DMA (e.g. SanDisk Extreme Pro) or tethered to Mac or PC |
| Software | Phocus for Mac and Windows (included) |
| Tethered Operation | Supported in Phocus by Hasselblad and Hasselblad Tether Plug-in for Lightroom® |
| Platform Support | Macintosh: OS x 10.5 and later. Windows: XP, Vista, Windows 7 (32/64 bit), Windows 8 |
| View Camera Compatibility | Mechanical shutters controlled via flash sync. Electronic shutters can be controlled from Phocus. Optional Battery Adapter for stand-alone operation of digital capture unit |
| Exposure Metering | Metering options: Spot, Centre Weighted and CentreSpot. Metering range Spot: EV2 to 21, CentreSpot: EV1 to 21 |
| Power Supply | Rechargeable Li-ion battery (7.2 VDC/2900 mAh). Optional Battery Adapter for stand-alone operation of digital capture unit |
| Operating Temperature | 0° – 45°C/32° – 113°F |
| Dimensions (Complete camera with HC 80mm lens) (W x H x D) | 153 x 131 x 207mm |
| Weight (Complete camera with HC 80mm lens) | 2500g |
Phocus provides you with comprehensive tethered camera controls as well as unique mobile solutions for more flexible studio work, client review, and so on. Phocus for Mac and Windows users is available for free download, with unlimited installations and distribution. On the Mac platform, Phocus offers support for RAW files from around 200 other digital camera RAW formats.
Natural Colours
Hasselblad’s Natural Colour Solution (HNCS) enables you to produce outstanding and reliable colours, so that skin tones, specific product colours, and difficult gradations reproduce beautifully every time, straight out of the box.
Digital Lens Correction
Hasselblad’s modern lens design has been optimised for digital perfection, including full automatic correction of colour aberration, distortion and light fall off. Phocus makes use of its detailed knowledge of the lens design and calculates the optical corrections for every shot at the given distance and aperture setting, providing perfect images, and an ideal basis for optimal image rendering and further processing. Hasselblad digital lens correction technology works automatically with all Hasselblad H System lenses.
Options on the Hasselblad digital lens correction
The following research project called “Screen1900” was organised by the Department of Media Studies at University of Trier (Germany).
We tested the use of flatbed scanners comparitively with cameras. deciding to use scanners only for paper documents. The advantage of scanners is that they give you the measurements of the object; with a camera you have to photograph the slides with a ruler and it is necessary to control the positioning of the camera lens in parallel with the slide. The main disadvantages: the workflow with scanners (especially for large quantities of slides) is much slower; colour management is done automatically (or very complicated); with many scanners it is not possible to scan wooden framed slides. If you want to photograph the slides and their mechanics as artefacts from different perspectives you have to use a camera in addition.
Between 2006 and 2010 we used a Nikon D70s (6.1 megapixels) with good quality macro lenses. The results are still very useful for many publications and are perfect for LUCERNA illustrations. It shows that every new system camera and good quality macro-lenses will deliver useful photographs for presentations and publications. Macro-lenses can be used for lanterns etc. As a rule prime lenses are better than zoom-lenses, but more expansive and you may need more lenses (we used 50 mm and 90 mm). After 2010 (in collaboration with the illuminago collection) Screen1900 used photographs shot with a Nikon D7000 (16.2 megapixels) which delivered more detailed results. For eLaterna Archive that will be launched in spring 2018 we developed a new standard to photograph lantern slide sets as digital examination objects. The practices were developed by the illuminago collection with a Nikon D800 (36.3 megapixels / 35.9 x 24.0mm CMOS sensor; Nikon FX format) and a Zeiss 100mm Makro-Planar T* 2/100mm ZF (manual focus macro lens).
As a source for transmitted light we use norm light with 5000 Kelvin (transparency flat viewer by Just / classic line). When I had to travel with an air-plane I used a small LED light panel. Non-flickering light and even illumination is technically important. The colour rendering index (CRI) Ra should be 90 or higher. If you want to combine transmitted light with reflected light (by flash or lamp light) the difference of light colours should not be too high (e. g. 5000K light panel and 3000K lamp light).
Tripods are necessary to photograph the artefacts from different perspectives. But for all photographs of the flat slide from above reproduction stands allow much more precise results and are easier to handle. When you have to use a tripod a lateral arm is very helpful (we used a mini tripod by Berlebach with lateral arm when it was not possible to transport the reproduction stand).
RAW-data are recommendable but need work. For exposure measurement and white balance of transmitted light illuminago uses transparent grey scales (Stouffer 21 steps). By measuring the light you get more comparable results of the different brightness of slides. Apart from a ruler we used Tiffen / Kodak Q-13 Gray Scale and Colour Control Patches for reflected light. For eLaterna we use datacolor SpyderCHECKR.
Recommendations and standards for the digitisation of historical lantern slide sets and related material for digital editions in the eLaterna Archive will be published in eLaterna Companion in spring 2018.
Recommendations for digitising photographic glass plates taken from Ingeborg Eggink, “‘Handle with Care’. Een inventarisatie van fotocollecties op glas in Nederland en praktijkervaringen als handreiking voor ontsluiting en beheer”, unpublished typescript of a Master of Arts – thesis at Reinwardt Academie Amsterdam, 2010. Courtesy Ingeborg Eggink.
- Technical capacities
- A digital camera and flashlight are more suitable for photography on glass than a flatbed scanner, because less heat is produced. The temperature of a scanner can reach up to 45° C. If photographing is not possible, scan glass plates on a flatbed scanner in the morning or after a break, then the temperature has not yet risen. Heat can weaken the gelatin of the image layer and thus cause a lot of damage.
- A multishot digital camera reduces the interference between the pixels and creates a sharper and more detailed image. Since photography on glass often has a limited format, with the intention of being projected and enlarged, it is necessary to create a digital file that is as detailed as possible.
- By default, a colour depth of 8- or 16-bits in RGB color space is used. If necessary the color can later be removed by digital processing, in the master this information is retained.
- By connecting the camera during digitization directly to a computer with a calibrated screen, immediate quality control is possible.
- The digital files are stored uncompressed, with tif being recommended. This can yield files of up to 250 – 500 Mb. Sufficient memory capacity must be present for this.
- To ensure the security of the digital assets, storage in at least two other places is recommended.
- Staff
- The staff must be familiar with possible forms of appearance and variation of photography on glass. Being aware of the risk of breakage, cracking, unstable emulsion, glass degradation, mold and silvering, allows the treatment of these fragile objects in a responsible manner.
- It would be ideal if staff members stored specific information about the physical conditions directly in the metadata of the digital file. Other data found on the object, such as information on the edges, cast marks and rasters should also be mentioned in the metadata. With the support of software these data can be transferred into the archive’s media asset management system.
- Color management is a way to adjust color deviations in the equipment. This requires a consistent mode of operation whereby each batch, the targets (= a grey scale and a color chart) are digitised over and over again. These targets have been calibrated and must conform to certain color values. These color values can be checked in Photoshop and adjusted if necessary. In case of excessive deviations, replacement of equipment is recommended.
- The lighting as well as the modulation gain in contrast and colour must meet the quality requirements. These are described in the DEN Directive for the production of image and the Metamorphose guidelines.
- Of course, nitrile gloves have to be used, the plates are handled carefully, staff works as clean and dust-free as possible.
- Sufficient time
Careful handling takes time. Photography on glass is often wrapped in fourflaps, which must be unfolded and folded again, according to instructions. The inventory number is frequently not noted on the object itself but on the object packaging (the fourflap).
The object and packaging must therefore be kept close together, even if there is still a cleaning process in between. This requires extra attention, logistics and time. To reduce the risk of damage, careful work must be considered more important than to reach the score of intended scans.
- Ample finances
The above shows which investments must be available at any rate. Roughly estimated, the equipment and software requires between 5,000 – 10,000 euros (in 2010). With that money, no digital file has yet been created! Careful working methods and checks allow a maximum of 12 images per hour to be made by trained personnel (including control, after-treatment, jpg compression for daily use, introduction of metadata and storage). Also the preparations and finishing treatment should be included in the cost estimation.
These costs are totally dependent on the state of the collection and the quality of the existing registration. Assuming that the photo collection on glass has not yet been inventoried and registered, the preparation costs will certainly account for two-thirds of the total digitization budget. For digital preservation, an average of 5-10% of the digitization costs per year as to be faced, these costs are not specific to photography on glass but apply to every digitization project.
- Efficiency
From the above it should become clear that the digitization of a photo collection on glass is a project in which a detailed project plan is of great importance. Digitizing will often be combined with repacking and possibly dry cleaning of the photo collection on glass. With such a combination, it is very important that the logistics are well thought through and that there is no delay in the process due to the lack of manpower or supplies. This requires good planning, a test phase and interim evaluation.
The advantage of a combined approach is that the photo collection on glass is used once and the risk of breakage is reduced to a minimum. If possible, it is advisable to carry out digitization internally (if possible in combination with cleaning and rewrapping). This could also be done by external forces. The big advantage is that risky transport is avoided. However, it is important to check carefully all potential hazards on the route between depot and digitization space.
For professional digitization, very extensive standards apply both for the equipment and for the working space. This may be a reason to nevertheless opt for external digitization. The efficiency of such an intervening project is difficult to assess. The advantage of digitizing an undisclosed photo collection on glass is clearly identifiable: this collection becomes accessible. Not only the heritage institution itself benefits from this, but through the presentation on the internet the whole world can benefit. Giving access to photography on glass can be regarded as an output of the heritage institution, as are exhibitions and publications. Because of the accessibility of the photo collections on glass, reactions come from the institution itself, other heritage institutions and society. These are sometimes additions or improvements to the registration, but sometimes also associative reactions. The users recognize people, places, buildings, see links between them and come up with stories. The hidden treasures can thus lead to a new interaction between collection and (internal and external) audiences; that is an identifiable and desired return.
Eggink states about a digitization project of glass photography at the Tropenmuseum (Amsterdam) 2001-2003, at that time department of the Royal Tropical Institute (KIT), nowadays part of the Nationaal Museum van Wereldculturen: “In addition to space, digitization also takes a lot of time. The occupation of two photographers (working together 6 days a week) was too tight for this. The digitization project in the Tropenmuseum has shown that the outsourcing of digitization to external forces, done on the premices of the museum, works very well. Good instructions, a lot of consultation and interim evaluation and adjustment is of great importance here. For digitization of large numbers, this method is certainly recommended.
This text was taken from De Luikerwaal. Courtesy Henc de Roo.
“Making digital photos from your lantern slides”
As a webmaster I must of course regularly photograph sets of glass magic lantern slides before I can put them on the site. Other collectors will also often need to be able to keep the slides from their collection in a digital form. I often get asked how magic lantern slides can best be photographed. Below are a number of possibilities and tips.
On the table-top
By far the simplest method is of course just to place the lantern slides on the table, preferably with a sheet of white paper underneath, and then take a photo from the hand. The outcome is usually not satisfactory. The picture becomes too dark, the perspective is distorted and the colours are not fresh and bright. Of course, with a program like Photoshop or Paint Shop Pro, I always use the latter, there is much that can be improved, but that takes a lot of time and the result usually remains moderate.
In your hand
A better method is shooting a hand-held slide because then the slide is lit from behind by the sun or artificial light. Make sure you have a quiet, bright, uniform background. Actually good results can only be achieved when someone is holding the slides and another takes the photographs. Here too a good photo editing program can work wonders, such as placing the picture in the right perspective again.
Scan
Almost every computer owner has a printer combined with a scanner. It is tempting to go ahead with this appliance because it allows you to easily scan multiple slides at the same time. However, the results are almost always very disappointing. Images become too dark and out of focus. In any case, it must be ensured that the picture on the lantern slide is placed directly on the glass plate of the scanner, so without a protective cover glass as is often the case. Otherwise, the image on the slide plate is a few millimetres above the glass plate and is therefore ‘out of focus’ and becomes so blurred that it even can no longer be corrected with a photo editing program.
Light box
Strongly resembling the ‘on the table-top method’ is the use of a (small) light box. This seems simple, but it is not, because the light in the box must be completely even for a good result. A simple light bulb certainly does not meet here. After a lot of experimenting with tl-bars and the like, I found the best solution in a simple ceiling lamp with LED lighting, which is for sale for little money. Because such a lamp is usually attached to the wall or ceiling, I naturally had to attach a cord with a plug to the lamp, but this is not such a difficult procedure. Of course, the surface of such a lamp must be completely smooth and flat and of course also large enough for most lantern slides. The result is a lot better than the ordinary ‘on the table-top method’, but a number of drawbacks remain. Also, not all photos taken by hand from a series of plates are the same size, so again a lot of work to improve them.
Permanent set-up
So I was looking for a solution with which I could make photos of sets of lantern slides with a fairly constant quality without much preparation and which also had to be improved only a little, for example because they all already have the same dimensions and the perspective does not change. I used an old photo enlarger for this purpose. These devices are inexpensive to find in shops specialized in recycled goods and in flea markets (Who still prints analogue photos in a dark room today?!) I replaced the enlarger with a digital camera and placed the light box on the wooden base board. The height and position of the camera is always easy to set and remains the same when photographing a series. When a particular camera is used for this purpose, the entire set-up can be left standing (garbage bag against the dust) and you can get started immediately with the next series.
Cost: part photo enlarger € 3.00 (flea market); wall / ceiling lamp € 7.00 (supermarket); cord / switch € 0.00 (rubbish bin); canon digital camera € 5.00 (recycle shop); total: € 15.00.